It may surprise you to learn that you have complete control over when your WordPress posts appear to have been published. You may alter the timestamp of a WordPress post to make it look in your archives and feeds as though it was published days, months, or even years ago. This feature is very helpful for organizing fresh content, correcting publication errors, or adding a library of previous content to a new website. In this article, you’ll learn the step-by-step procedure for backdating a post using both the Classic Editor and the current Block Editor.
Reasons to Backdate a WordPress Post
Backdating isn’t just a way to change history; it’s a useful feature for organizing and presenting your content logically. Here are common reasons why you might want to backdate a post:
- Creating a Foundational Archive
- Organizing Serial or Thematic Content
- Fixing Errors in Publication
- Making Content Appear Relevant
- Managing Sticky Posts
Creating a Foundational Archive
If you are launching a new website or blog, but already have a good amount of existing content (example – from a previous site or written offline), backdating allows you to:
- Populate the blog with a history of posts quickly.
- Establish a chronological history for your content from the true date of creation, not the site launch date.
Organizing Serial or Thematic Content
If you publish a series of posts on a specific topic that you want users to read in a particular order, but you wrote them over a short period:
- You can set the dates to be sequential (example – Part 1 on June 1st, Part 2 on June 2nd, etc.) even if you published them all on the same day. This ensures they appear in the correct order in archives and feeds.
Fixing Errors in Publication
Sometimes you may publish a post with the wrong date accidentally,or perhaps you hit “Publish” prematurely.
- Backdating allows you to correct the timestamp to reflect the actual intended or original publication time.
Making Content Appear Relevant
If you are replacing a very old, deleted post with new,updated content on the same topic:
- You might choose to use the original publication date to maintain the post’s established age and authority, rather than making it look like a brand-new article.
Managing Sticky Posts
You might occasionally backdate an otherwise new post simply to remove it from the very top of your blog feed (if you have multiple “sticky” posts or don’t want it to dominate the “New” section).
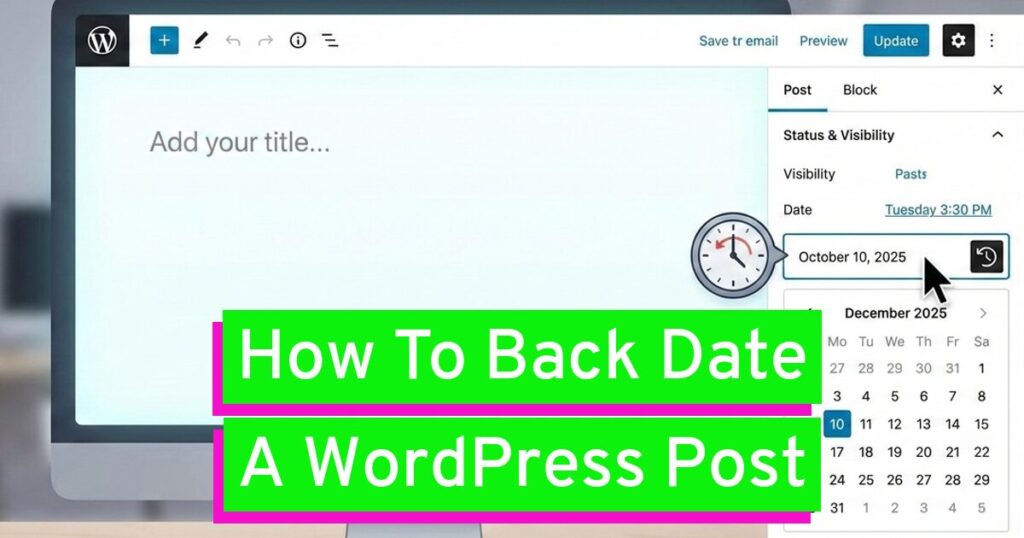
Step-by-Step Tutorial: How to Backdate a WordPress Post
The method for backdating a post is different depending on whether you are using the Gutenberg Editor(the block editor, standard since WordPress 5.0) or the Classic Editor.
Method 1: Backdating in the Gutenberg (Block) Editor
This is the standard process for modern WordPress installations.
1. Edit the Post
- Navigate to your WordPress dashboard.
- Go to Posts -> All Posts.
- Click the title of the post you want to backdate to open it in the editor.
2. Locate the Publish Panel
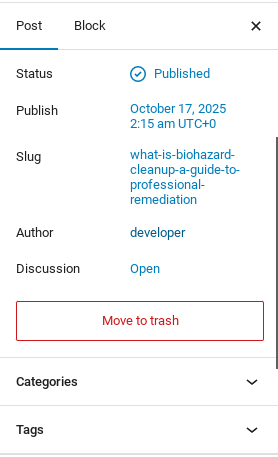
- In the editor, look at the Settings sidebar on the right side of the screen.
- If the settings are not visible, click the gear icon in the top-right corner to open the sidebar.
- Within the sidebar, look for the Status & Visibility panel (it might be simply labeled Post at the top)
3. Change the Date and Time
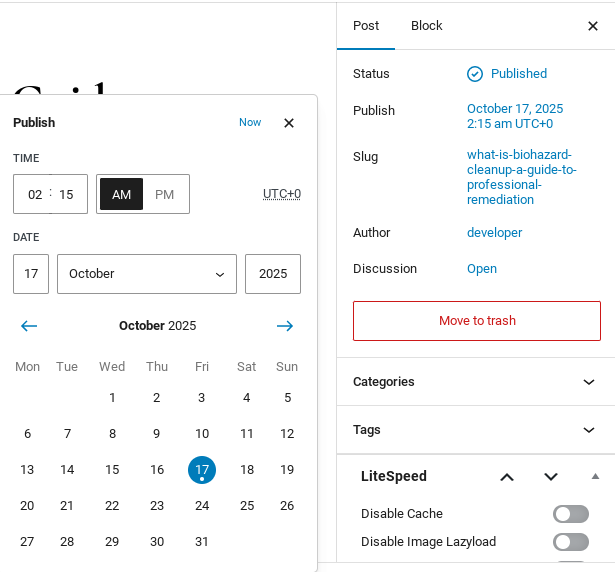
- Find the field labeled Publish or Published on. This field shows the current publication date and time.
- Click on the date and time displayed (example – “Immediately” or the current date).
- A calendar and time selector will appear.
- Select the desired month, day, and year for your backdated post.
- Adjust the time if necessary.
4. Save and Update
- After selecting the new date, the blue Update button (if the post is already published) or button (if it’s a draft) will appear.
- Click Update or Publish to save the changes. The post will now appear on your site and in your archives as if it was published on the date you set.
Method 2: Backdating in the Classic Editor
If you are using the older Classic Editor plugin:
1. Edit the Post
- Navigate to Posts -> All Posts.
- Click the title of the post to open it.
2. Locate the Publish Meta Box
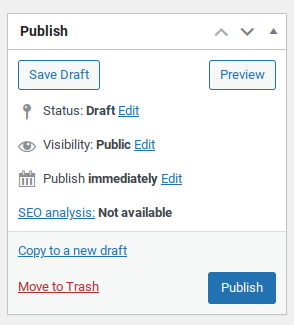
- On the right side of the screen, find the Publish meta box (it’s typically near the top)
3. Modify the Timestamp

- Within the Publish box, look for the Published on or Publish immediately field.
- Click the Edit link next to the current date and time.
- A set of drop-down menus will appear for the month, day, year, hour, and minute.
4. Select the New Date and Time
- Set the desired date and time for your backdated post.
5. Save and Update
- Click OK to close the date/time editor.
- Click the blue Update button to save the changes.
In Summary
Backdating a WordPress post is a powerful and straightforward tool, whether you are utilizing the Gutenberg Block Editor or the Classic Editor. By simply adjusting the “Published on” timestamp in the post settings, you gain complete control over how your content is organized and displayed within your site’s chronological archives. Mastering this technique allows you to fix errors, establish a foundational content history, or manage complex content series with perfect sequential ordering. With this simple process, you can now curate your blog’s timeline exactly as your content strategy requires.
Leave a Reply